Method 1 – Open Notebook Function
- Home
- Method 1 – Open Notebook Function
INSTALLATION STEPS FOR KEY2SUCCESS USERS – Method 1 – Open Notebook Function
Microsoft recently introduced a new method of opening OneNote Notebooks. We are excited to share this new method with our community. Our first impression is that this installation method will change our OneNote Users’ relationship with digital planning. We ask that you attempt this installation method and provide us with feedback. We will be updating our installation walkthrough video soon.
For business and SharePoint users we have found success with this method. It does require you to move the notebook to your OneDrive. You need to have the FULL version of OneNote ( If you do not have the desktop version of OneNote, you can click here to download< ) The “Windows 10” version of OneNote will not work using this method.
You first download your file using the link we provide either within your Key2Success account page, or the email we send out with your download links. We recommend downloading your .Zip file to your DOWNLOADS folder. Once downloaded follow the steps below.
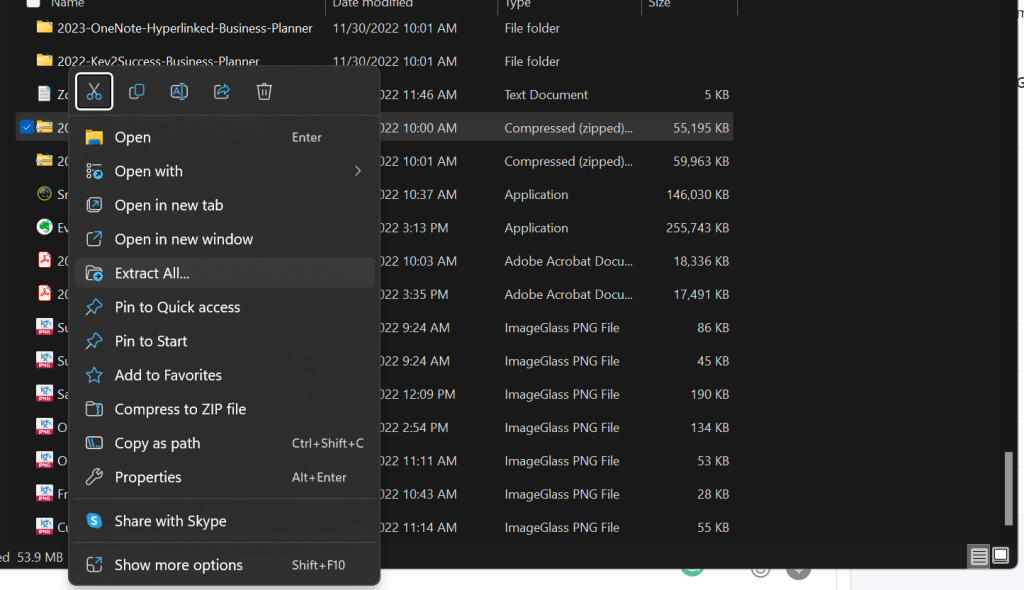
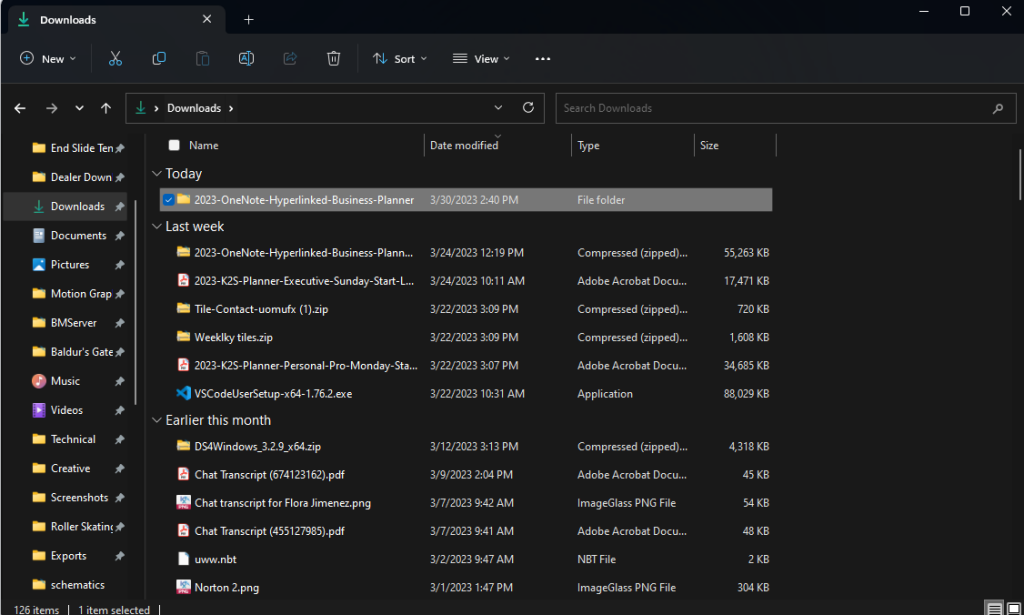
- It’s VERY important to RIGHT-click and Unzip the folder found in the file you previously downloaded. Right-Click and choose “extract here” (we recommend extracting to your “Downloads Folder”. This unzipped folder is your notebook folder. (NOTE: You have to right-click and extract. Double clicking does not extract it properly.)
- It’s VERY important to RIGHT-click and Unzip the folder found in the file you previously downloaded. Right-Click and choose “extract here” (we recommend extracting to your “Downloads Folder”. This unzipped folder is your notebook folder. (NOTE: You have to right-click and extract. Double clicking does not extract it properly.)
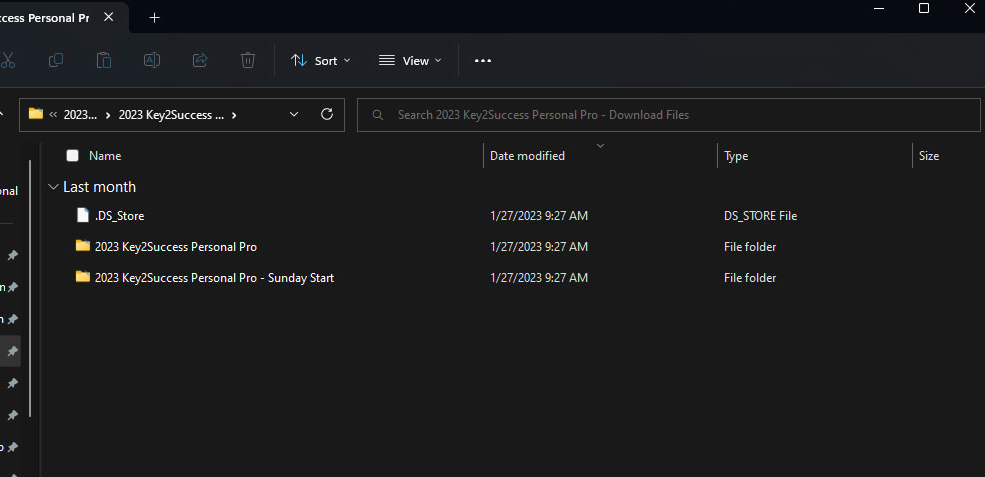
2. The next step is to open the Extracted folder (located in your downloads folder) NOTE: (it should not have a zipper on the icon)3. Inside of your extracted folder, you will see 2 options. One folder says “Sunday Start” and one is unlabeled. The unlabeled one is for the Monday Start version of the planner. Open the folder of the version you would wish to use as the first day of the week.
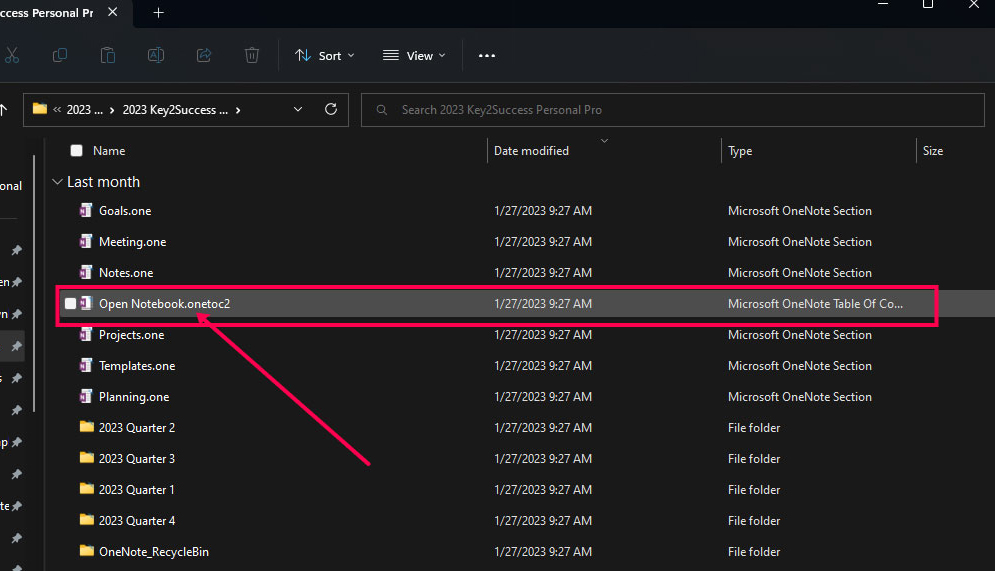
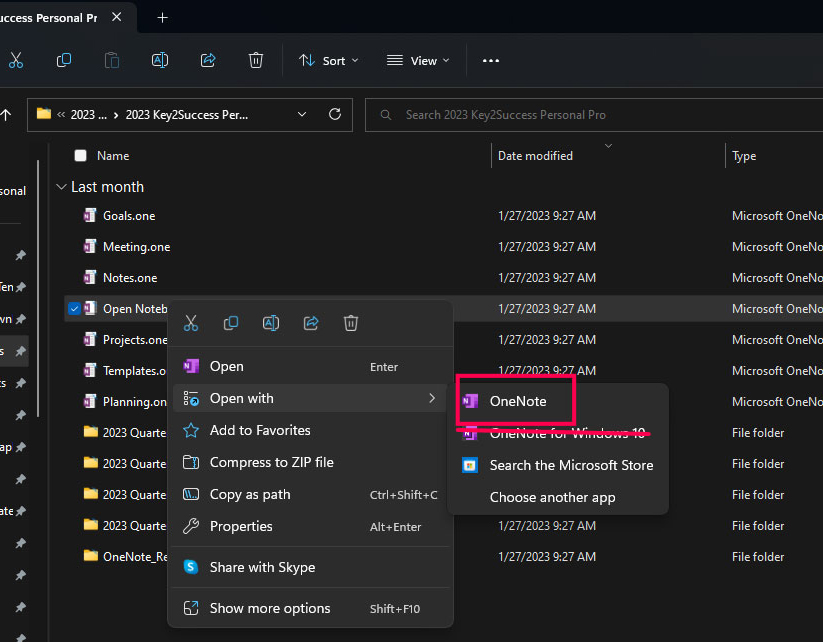
- 4. Inside of either the “Monday Start” or “Sunday Start” folder there is an icon that says “open notebook.onetoc2” It is very important to right-click this icon and move on to the following step.
5. The next step is to hover over the “open with” section and then choose “OneNote” NOT “OneNote for Windows 10”
6. You planner will now be open but it is in “archive mode” The next step is to click on “File” in the upper-left area of OneNote.
7. To finish uploading the planner Click on the “Settings” Button to the left of the name of your planner, then click “Share or Move”

If this method does not work for you, use Method 2.


