How to Connect Apple Pencil to iPad
Are you ready to take your digital planning to the next level with the Key2Success Digital Planner? In this comprehensive guide, we’ll not only show you how to connect your Apple Pencil to your iPad but also how to seamlessly integrate it with the innovative Key2Success Digital Planner, revolutionizing the way you organize your life and work.
Before You Begin: Setting the Stage for Digital Planning Mastery
Before diving into the pairing process, let’s ensure you have everything you need to optimize your digital planning experience:
- Update Your iPad: Ensure your iPad is running on the latest software version to guarantee compatibility with the Key2Success Digital Planner and Apple Pencil.
- Check Your Apple Pencil Model: Confirm that you have the appropriate Apple Pencil model that works seamlessly with your iPad.
- Charge Your Apple Pencil: If needed, charge your Apple Pencil to ensure uninterrupted usage during the planning process.
- Download the Key2Success Digital Planner: Head to the App Store and download the Key2Success Digital Planner to unlock a world of organizational possibilities.
With your devices prepared, let’s proceed to how to connect your Apple Pencil to your iPad and integrate it with the Key2Success Digital Planner.
Pairing Your Apple Pencil with Your iPad: A Step-by-Step Guide for Key2Success Users
1. Pairing Apple Pencil (USB-C):
- Ensure your iPad is updated to iPadOS 17.1 or later.
- Slide open the end of your Apple Pencil and attach a USB-C cable.
- Connect the other end of the cable to your iPad.
2. Pairing Apple Pencil (2nd Generation):
- Simply attach the second-generation Apple Pencil to the magnetic connector on the side of your iPad.
3. Pairing Apple Pencil (1st Generation) with iPad (10th Generation):
- Remove the cap from your Apple Pencil and plug it into the USB-C to Apple Pencil Adapter.
- Connect the adapter to your iPad.
- Tap the Pair button when prompted to complete the connection.
4. Pairing Apple Pencil (1st Generation) with iPad (6th through 9th Generations):
- Remove the cap from your Apple Pencil and plug it into the Lightning connector on your iPad.
- Tap the Pair button when it appears to finalize the connection.
Integrating Apple Pencil with Key2Success Digital Planner: Elevating Your Planning Game
Once your Apple Pencil is successfully paired with your iPad, launch the Key2Success Digital Planner and prepare to experience digital planning like never before. Use your Apple Pencil to effortlessly navigate through the planner, jot down notes, highlight important tasks, and sketch out your goals with precision and ease.
Troubleshooting Tips: Ensuring Seamless Connectivity
Encountering issues while pairing your Apple Pencil? Follow these troubleshooting tips to resolve common connectivity issues:
- Ensure your Apple Pencil is properly connected to your iPad according to its model.
- Restart your iPad and attempt to pair your Apple Pencil again.
- Check that Bluetooth is enabled on your iPad.
- If necessary, forget the device in your Bluetooth settings and attempt to pair your Apple Pencil again.
- For further assistance, contact Apple Support.
Embrace the Power of Digital Planning with Key2Success
By following this guide, you’ve not only mastered the art of how to connect your Apple Pencil to your iPad but also unlocked the full potential of the Key2Success Digital Planner. Seamlessly integrate your Apple Pencil with the planner to streamline your organization, enhance productivity, and achieve your goals with precision and clarity.
Get ready to embark on a journey of digital planning with Key2Success and Apple Pencil. Your path to success starts here!
Visit the OneNote Planner Shop
Visit the GoodNotes Planner Shop
Digital planning on an iPad involves using various applications and tools to organize your schedule, tasks, notes, and goals electronically. It offers a convenient and flexible way to manage your life and work digitally, utilizing the capabilities of the iPad and its accessories like the Apple Pencil. Here’s an overview of digital planning on iPad:
1. Digital Planning Apps: There are several digital planning apps available for iPad, each offering unique features to cater to different planning styles and preferences. Some popular apps include GoodNotes, Notability, Procreate, Noteshelf, and Keynote, among others. These apps provide functionalities such as note-taking, task management, calendar integration, drawing tools, and customizable templates.
2. Features and Tools: Digital planning apps on iPad typically offer a wide range of features and tools to enhance your planning experience. These may include:
- Note-taking: Write, draw, or type notes directly on your iPad using the Apple Pencil or your fingers.
- Task Management: Create to-do lists, set reminders, and organize tasks according to priority and deadlines.
- Calendar Integration: Sync your digital planner with your iPad’s calendar app to keep track of appointments, events, and meetings.
- Customization Options: Customize your planner with personalized templates, colors, fonts, and layouts to suit your preferences.
- Collaboration: Share your digital planner with others for collaborative planning and project management.
- Cloud Syncing: Access your planner across multiple devices by syncing it with cloud storage services like iCloud, Google Drive, or Dropbox.
3. Benefits of Digital Planning on iPad:
- Portability: Carry your digital planner wherever you go on your iPad, eliminating the need for bulky physical planners.
- Flexibility: Easily modify and rearrange your plans, notes, and tasks digitally without the constraints of paper-based planners.
- Efficiency: Streamline your planning process with digital tools like copy-paste, search functions, and digital stickers.
- Environmentally Friendly: Reduce paper waste by opting for a digital planning solution on your iPad.
- Creativity: Explore your creative side with drawing tools, digital stickers, and customizable templates to personalize your planner.
4. Getting Started:
- Choose Your App: Explore different digital planning apps available on the App Store and choose one that best suits your needs and preferences.
- Familiarize Yourself: Take some time to familiarize yourself with the features and tools of the app you’ve chosen.
- Experiment: Experiment with different planning styles, templates, and organizational methods to find what works best for you.
- Integrate with Accessories: Consider using accessories like the Apple Pencil for precise handwriting and drawing on your iPad.
Digital planning on iPad offers a versatile and efficient solution for organizing your life and work, allowing you to stay productive and on top of your tasks wherever you go. Whether you’re a student, professional, or busy individual, digital planning on iPad can help you stay organized, focused, and motivated.
Visit the OneNote Planner Shop
Visit the GoodNotes Planner Shop

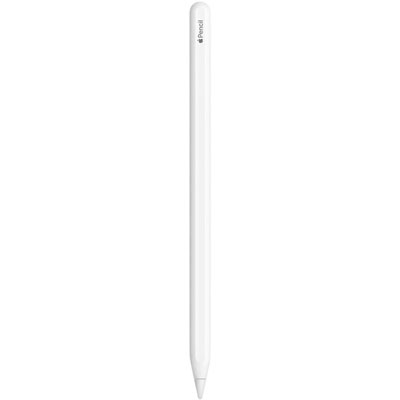
Apple Pencil
You can’t benefit from digital planning if you don’t have yourself a writing device. The Apple Pencil (2nd Generation) provides you a real-life writing experience on the iPad. It makes not only note taking possible, but makes painting, sketching, and even doodling while you are between calls a better than ever experience.
However, at a price tag of over a hundred dollars, it can be another investment you need to make. We have found that the Active Pencil by Meko is a great alternative. The pencil has a rechargeable battery, a comparable form factor of the Apple Pencil and it is equipped with palm rejection technology. And is currently priced under $25.
View Meko Active Pencil on Amazon
Apple Pencil Get 2 – Compatible with iPad mini (6th generation), iPad Air (4th generation), iPad Pro 12.9-inch (3rd, 4th, and 5th generations), iPad Pro 11-inch (1st, 2nd, and 3rd generations)
Meko Active Pencil – Compatible with IPad Pro 11 inch 1st/2nd Gen, iPad Pro 12.9 inch 3rd/4th Gen, iPad Air 3rd/4th Gen, iPad 6th/7th/8th Gen, iPad Mini 5th Gen
Visit the OneNote Planner Shop
Visit the GoodNotes Planner Shop


