How to Add Custom Templates to Your reMarkable (Step-by-Step)
reMarkable's image-insertion feature (added in firmware 3.27) lets you drag or paste a PNG image into a notebook using the desktop app. Direct drag-and-drop only works in notebooks, not PDFs, so to place a Key2Success Tile onto your PDF planner page, you paste it into a notebook first, then lasso, copy, and paste it onto the actual planner page. No Connect subscription, no third-party software.

reMarkable added official image support in firmware 3.27, and it changed what's possible with a PDF-based planner like Key2Success. Here's the part most explanations skip: the feature only drops images directly into notebooks, not PDFs. Since the Key2Success Planner is a PDF, getting a tile onto an actual planner page takes one extra step. It's still simple, and it works, but it's not quite the drag-straight-onto-your-planner process the feature name implies.

Before You Start
Update your reMarkable to the latest firmware. Image insertion needs firmware 3.27 or later, and if your device hasn't synced in a while, this is the step people skip and then can't figure out why nothing is working.
You'll also need the reMarkable desktop app for Windows or macOS. This feature is desktop-only right now; the mobile apps don't support it, so you can't do this step from your phone or tablet alone.
Download the Key2Success Tile PNG files you want to your computer before opening the desktop app, so you're not hunting for files mid-process.

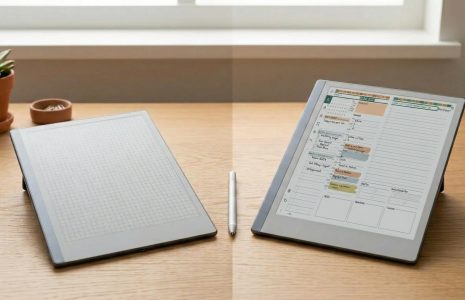
Daily tiles placed on reMarkable Paper Pro and Paper Pure using this same process.
Step-by-Step: Adding a Tile to Your Planner
- Open the reMarkable desktop app on your Mac or Windows computer and make sure it's synced to your account.
- Open or create a notebook inside the desktop app. This is a staging step, the tile doesn't end up here permanently.
- Drag the tile PNG from your file explorer or Finder window directly onto the open notebook page. You can also copy the image to your clipboard and paste it in with Ctrl/Cmd+V.
- Let it sync to your tablet. This usually happens automatically within a few seconds; a manual sync from the tablet's settings menu speeds it up if you're impatient.
- On the tablet, open the notebook where you just placed the tile image.
- Select the Lasso tool and draw a loop around the tile image, then tap Copy from the action menu that appears.
- Navigate to your Key2Success Planner PDF and open the page where you want the tile.
- Paste the image onto that page. It drops in ready to work with.
- Reposition, resize, or rotate the tile using the selection handles. Rotation snaps in 45-degree increments. Once it's placed, write directly on top of it just like any other page content.
How I Actually Use This
I run this exact workflow to add call tracking and habit log elements to my own daily pages, things the base planner doesn't include but that I want on the page anyway. The two tiles I lean on most, my life balance wheel and my SWOT sheet, both go on through this same paste-into-notebook-then-paste-onto-PDF path. It takes an extra ten seconds compared to a straight drag-and-drop, and once you've done it twice it's automatic. The same process works just as well for a meeting notes tile if that's more your day-to-day.

A meeting notes tile pasted onto a reMarkable Paper Pro page using the same steps.
Common Issues
Check your firmware version first. Image insertion requires firmware 3.27 or later; on older firmware, the feature simply isn't there yet.
That's expected. Direct drag-and-drop only works inside notebooks. You need the notebook-to-PDF copy-paste step described above to get a tile onto a PDF page.
reMarkable caps inserted images at 3200 x 3200 pixels and downscales anything larger. If a tile looks soft, check the original file size before placing it.
Dragging several images into a notebook at once stacks them. Drag and place one tile at a time, or separate them manually on the tablet afterward.
See this exact process on the actual e-ink screen, tile by tile.
Get the Key2Success Tiles
Daily, habit, SWOT, and life balance tiles, ready to drop into your planner.
Browse Key2Success TilesFrequently Asked Questions
Can I drag a tile directly onto my Key2Success Planner PDF?
Not directly. reMarkable's drag-and-drop image feature only works inside notebooks. To get a tile onto a PDF page, paste it into a notebook first, then use the lasso tool on the tablet to copy it and paste it onto the PDF page.
Do I need a Connect subscription to add custom templates?
No. Image insertion, added in firmware 3.27, is available to all reMarkable device owners and does not require a Connect subscription.
Can I add images from my phone or the reMarkable tablet directly?
Not yet. Image insertion currently works only through the reMarkable desktop app on Windows or macOS. Mobile apps don't support it.
What image format and size should a custom tile be?
PNG or JPEG, up to 3200 x 3200 pixels. Larger images are automatically downscaled by the device, which can soften fine detail.
Can I move a tile after I've placed it on a page?
Yes. Once placed, a tile can be selected, moved, resized, and rotated (in 45-degree increments) directly on the tablet, and you can write on top of it like any other page content.